Beauty
5 Must Know Elegant Mehndi Designs To Get The Bridal Mehndi Of Your Dreams

Wedding season is around the corner. If you’re a bride-to-be, this is the most fun part when you go shopping for your clothes, accessories, pick out hairstyles and also finalise on your mehendi design.
With artists practically in every lane, each with countless designs, it can be a mindboggling exercise to pick one bridal mehendi style. How, then, can the bride take a decision about one of the most important aspects of her wedding day?
Take a breath and spend 5 minutes reading this. And allow us to show you some popular mehndi designs for weddings, and a few tips and precautions to get stunning mehndi for your special day.
Our 5 All-time Favourite Bridal Mehndi Designs
1 The Paisley Print:
 The beautiful curved motifs of mangos have been adorning the hands of brides for years. Filled with delicate patterns, the smooth flow brings an age-old charm to your wedding.
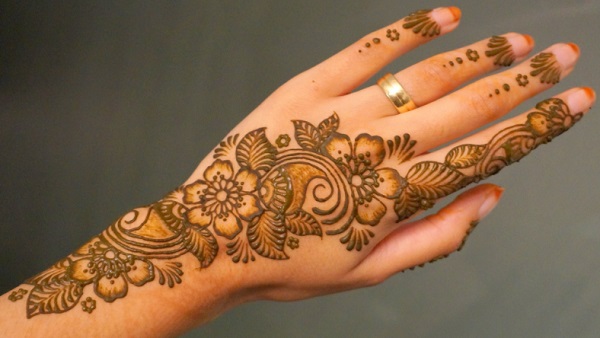
2 The Floral Pattern:
 A floral pattern will match any bridal ensemble. Leaves, petals, vines and flowers come together into a gorgeous explosion of design.
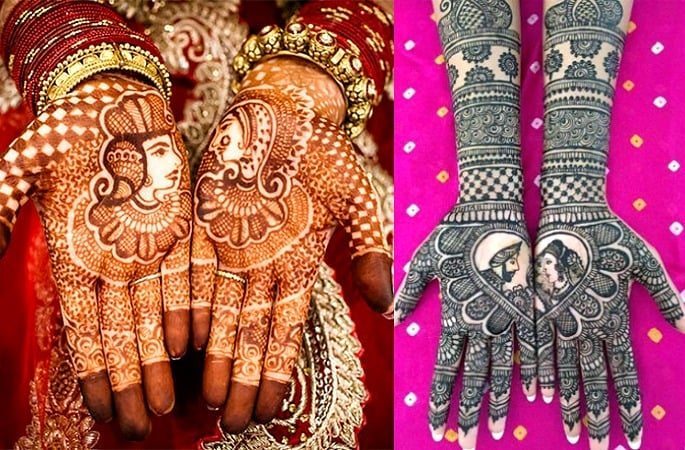
3 The Raja and Rani:
 This common and endearing mehndi design for hands represents the bride and the groom, and is a Mughal style passed down through the ages.
4 The Peacock Passion:
 From attire to jewellery and to mehendi too, the elegant peacock design is a timeless addition to any wedding. The grace and style is unmatched by any mehendi design.
5 Arabic mehendi:
 If you want a touch of the exotic, you can pair off any traditional design with a classy Arabic pattern that will complement your wedding look. This Arabic henna art is gorgeous and has many intricate designs!
8 Tips To Get Your Bridal Mehndi Done:
1. Wash your hands and feet with soap and dry them properly. Don’t apply any creams or oil as this will act as a barrier between the henna and your skin.
2. Sit in a quiet place with proper light. Avoid direct sunlight.
3. Wear comfortable and, if possible, old clothes.
4. Put your mehendi 24-48 hours before the big day. And keep it on for at least 8-12 hours.
5. Dab on the mixture of lemon juice and sugar to your mehendi after it dries a bit. Don’t overdo it as it may dilute the colour.
6. Use ‘clove steam’ to deepen the colour. Warm a few cloves in a thick pan and hold your hands over the smoke.
7. Once dry, gently rub off the mehndi and apply some balm or oil to it. Don’t wash your hands for at least 12 hours.
8. Lastly, wrap your hands with cling film, cloth or bandages to prevent them from coming in contact with any surface.
4 Tips To Prevent Your Mehendi From Getting Spoiled:

1. Don’t drink too much liquid just before or during the mehndi application. You don’t want to make a trip to the bathroom with fresh mehndi, do you?
2. Don’t shake your hands to dry your mehndi faster. It might spread and completely ruin your design. Also, wait for the mehndi to dry before you join your friends on the dance floor. You could accidentally smudge it.
3. Absolutely do not use a hair-dryer on your hands in an attempt to dry your mehndi faster. You will smudge the design beyond repair.
4. Don’t shave, wax or bleach your arms or legs after your mehndi session. You will scrape off the top layer and take away most of the colour. Take care of all the beauty treatments before your mehndi ceremony.
Top 4 Tips to Remember Before Your Mehendi:

- Just like your makeup artist, book your mehndi artist well in advance. The criteria to keep in mind while zeroing down an artist would be his/her design, your budget and also, the type of design you want. The artist has to be a perfect balance of all these qualities to be your mehndi artist.
- Eat and be well rested before your session starts. It could be hours before your complete mehndi is applied.
- Keep waste cloth ready for your artist. They may need it between the session in cleaning the cone, or correcting errors.
- Get your nails manicured and pedicured before this ceremony. Also, don’t forget to apply petroleum jelly on your nails, so that you don’t get henna stain on them.
How to Make Mehndi Cone at Home:

- Take enough henna powder in a bowl.
- Sift it nicely. If need be, sift it 3-4 times, so that no hard particles are present in the powder
- Now, boil a cup of water with tea leaves for 5 minutes.
- Add this water to the powder to make henna paste
- You can add a little lemon juice, so that the paste becomes sticky
- Now keep stirring the paste, till you can lift your spoon 5 inches away, with henna making a fine thread of paste from spoon end to bowl end.
- If the paste is runny, keep stirring the mixture, till you get the desired consistency.
- Now, transfer this mixture in a glass bowl, and add just a little water, so that it doesn’t dry out overnight.
- Next day make your mehndi cones.
- If you are still unsure of this method, get your mehndi artist to make a homemade cone, as commercial cones may not be as dark a stain, as desired by you!


